This glorious app, CamperMate has saved our asses more times than we can count. The best thing is that it is absolutely free. It was made for campers around New Zealand or Australia.
Seriously, you need this app.
Upon opening the app for the first time, it seems pretty self-explanatory.
And yet, there were things we didn’t find out until much later during our 9 months’ travel in New Zealand.
Our car was basically our accommodation as well as our transport! Wanted to get started on your own vanlife in New Zealand?
I hopped onto the official CamperMate site just now and I think it doesn’t tell you much except how to add a new location.
So here’s a guide for all you first-timers.
Table of contents:
This guide is based on version 4 of the app. Here’s the intro video by CamperMate if you’d like to see that.
- The basics of CamperMate
- Categories available on CamperMate
- Adding a new item on CamperMate
- How useful are comments on CamperMate?
- Another app we find useful
If you’ve used CamperMate before, maybe you’ll learn something new here,
Feel free to drop a comment below if you have another tip that we left out from this guide.
The Basics Of CamperMate
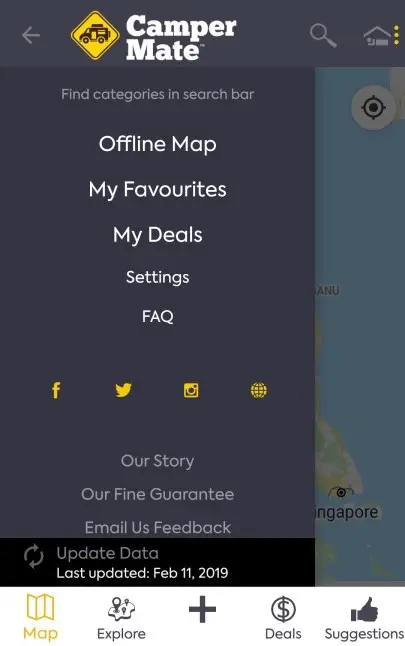
Firstly, you’ve got to download the app. It can work on a PC or mobile phone – IOS and Android.
There is an option to download the offline map for New Zealand or Australia but you may not be able to see the latest comments as they come in.
Essentially, you switch on your current location. And open CamperMate.
Then use your fingers to zoom in and out of the map around your location. Give it some time to load if the signal is bad.
You will see tiny icons appearing all over the map. A blue dot represents your current location (if you don’t see it, turn on your location).
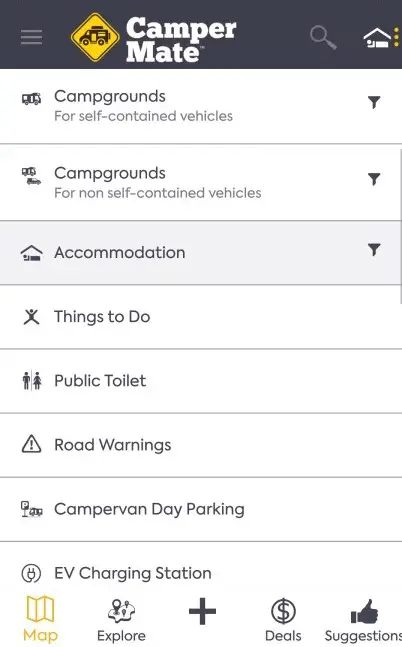
There are many categories available (see next section). Filter out the categories by selecting all (“Everything”) or just one particular category. You can’t add more than one. Or at least, I haven’t figured out how.
And you can further filter out accommodation and campsites according to what facilities you need.
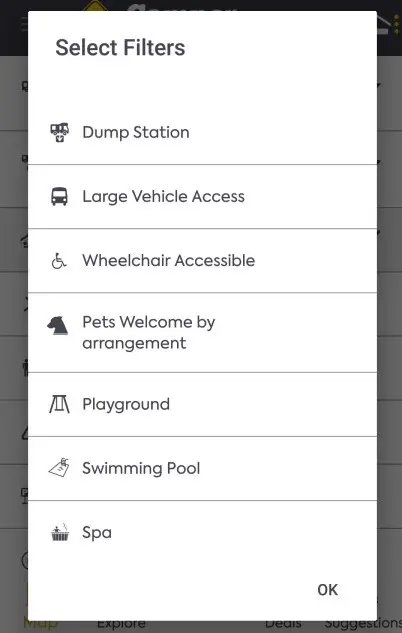
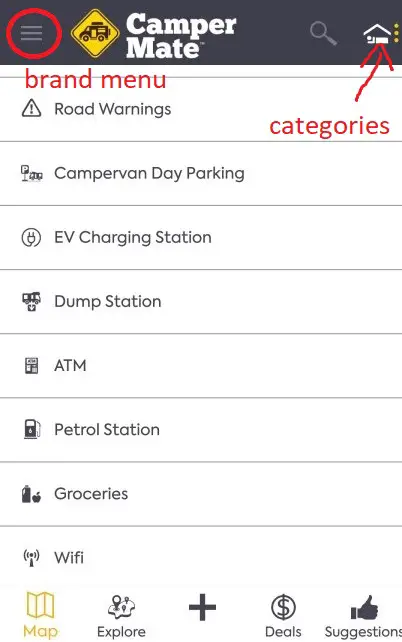
The filter button is next to the campground icons when you open up the Category Menu on the top right corner of the app interface. Followed by the accommodation symbol (refer to picture below) .
We typically use CamperMate to find somewhere to sleep. And to check if there’s anything interesting along our route. Even to find free Wifi to do more travel research.
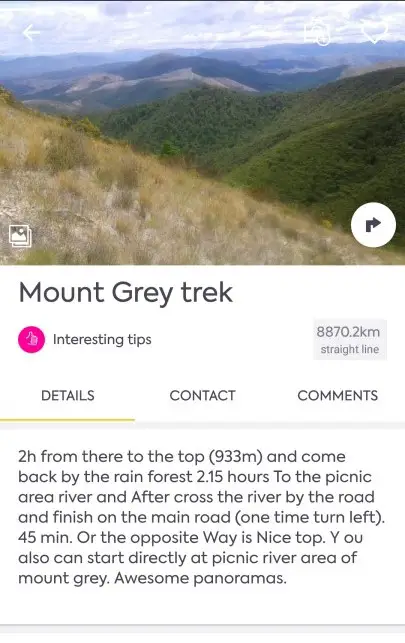
If you click one of those little icons, there will be a photo, a short description and maybe even a phone number or website.
Here’s an example for a spot to visit:
And here’s an example for a typical accommodation:
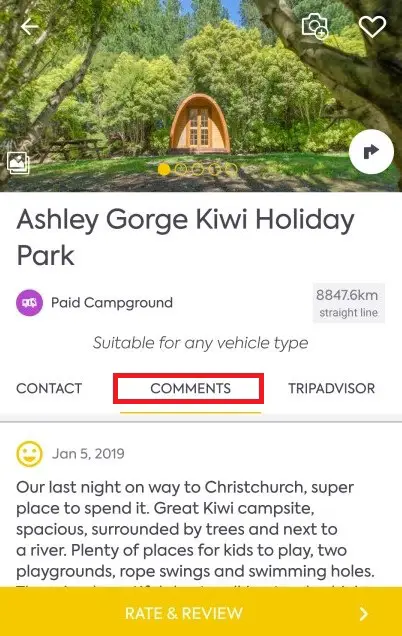
Notice that there are 3 tabs you can flip between. Details, Contact and Comments.
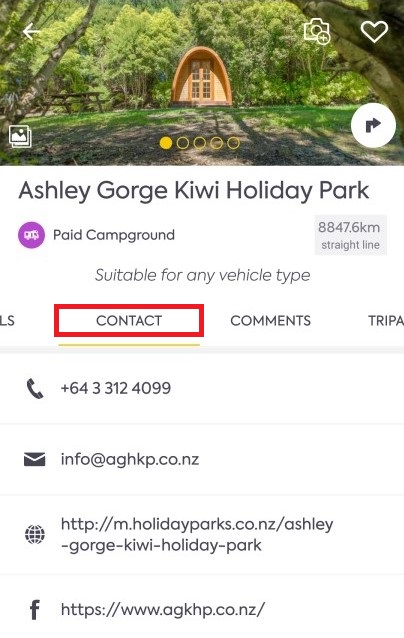
You can switch to the Comments tab to read what other campers have to say about the place, facility, etc.
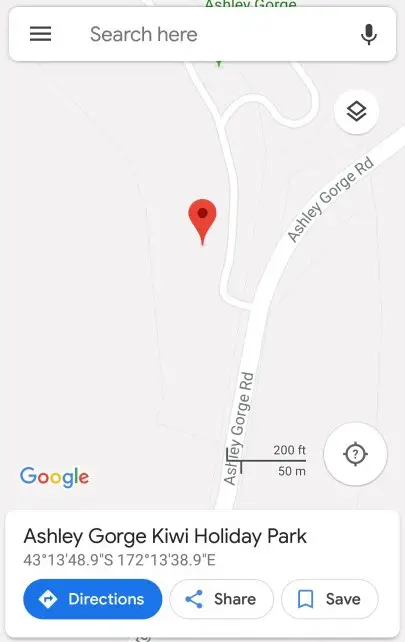
In addition, you can click on the arrow symbol to get directions (Campermate will direct you to the location via Google Maps).

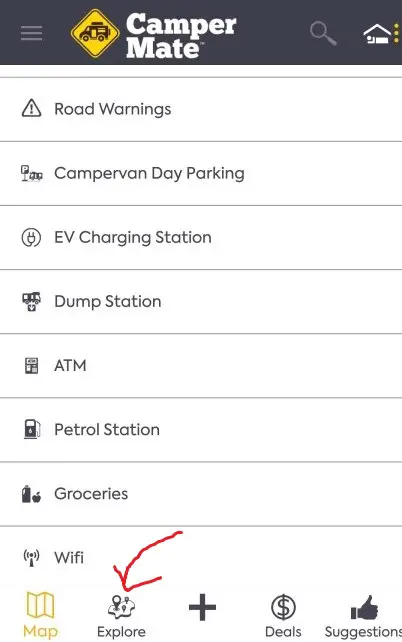
And then, there’s the Explore button:
The “Explore” button is supposed to help out find places close to you fast but I personally find the page a bit messy and prefer not to use this feature.
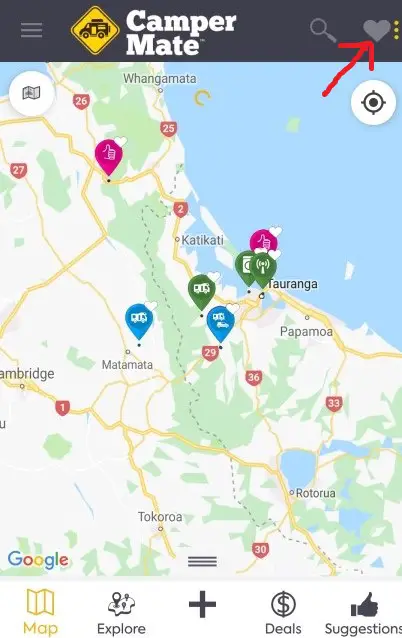
If you want to bookmark something, you can do that by adding it to your Favourites. I love this feature. Makes the map looks much less cluttered if you filter by your Favourites instead.
Simple, right? Now on to the categories.
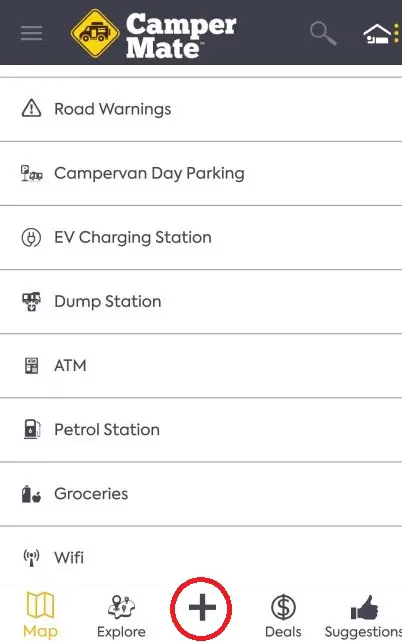
Categories Available On CamperMate
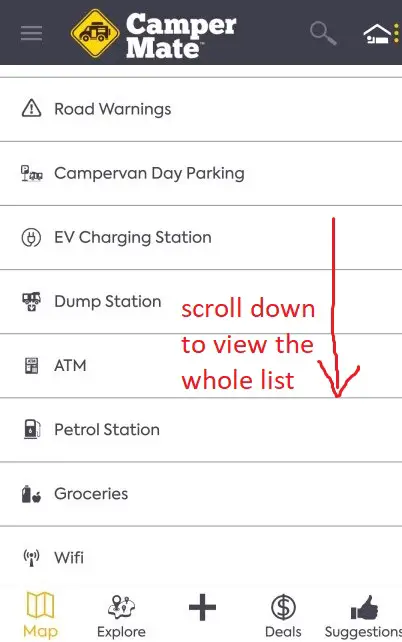
We’ve listed them in no particular order here. Yeah, I know there’s a lot. But we don’t use everything and you probably won’t either.
Click the “more” icon on the top right of the app user interface to access the full list of the categories available.
- Showers – blue for cold; red for hot. Typically, the blue ones are free and are usually outdoor, near a beach or river. The red ones may be swimming centers or hostels where you have to pay $0 and up to $5 for a hot shower.
- Campsites – green are free, blue are cheap, and purple represent the more pricey campgrounds. The blue campsites are usually run by DOC (Department of Conservation) and usually cost $8 pppn for a tent (unpowered) site. Campsites can be filtered by non-self contained and self contained too. If you don’t know what that means, then our post on starting van life in New Zealand should be helpful to you.
- Accommodation – not all the hostels, hotels and lodges will appear here. We don’t use this category actually because we’d rather search for an Airbnb if we crave some luxury or just want to escape a storm.
- Paid driveways – Some of the purple campsite icons actually look different. The symbol is a camper car under a roof. These are actually private driveways that the owners let campers park on for a fee. Some of the owners we met let us use their showers and BBQ stoves. This is a great way to meet some locals too!
- Things to do – these may be paid (purple) or free (pink thumbs up). Note – not all the pink are free but the majority are.
- Wifi – again, green icons are free (typically public libraries or limited Wifi from cafes and supermarkets). Blue/purple icons mean you have to pay for the Wifi.
- Road warnings – not sure how reliable these are. We prefer to check our routes on the official NZTA website instead before we head for a mountain pass.
- Campervan Day Parking – If you have a large campervan/ motorhome/ RV, you might find this useful. Not all places are happy to have a bulky vehicle parked there.
- EV charging station – wasn’t applicable for us but this is an actual category in CamperMate
- Dump Station – pay attention here! These are where you can dump your waste water out. And refill with clean water. Do not EVER dump your dirty used water out anywhere else! Mind that these drain outlets often have a faucet (and maybe a pipe) right next to them. These are for cleaning out your waste water containers. NOT for drinking or washing your dishes (that’s just gross). The drinking water tap is usually not far away. Take a good look around. Also, it’s NOT a good idea to wash your car here. Dump stations are usually very popular and fellow campers won’t appreciate you making the area soaking wet.
Other Useful Categories
- ATM – for those cash emergencies!
- Public toilets – these include flush or long drop toilets. Sometimes, there are photos.
- Petrol Station – there’s a better app (also free) for finding cheap petrol stations. It’s called Gaspy. You’re welcome.
- Groceries – supermarkets and dairies. Pretty obvious.
- Information center – most towns and cities in New Zealand have an I-site where you can ask for travel advice (for free) on what to see, where to camp, etc
- Hospital and police stations – hopefully, you won’t need these.
- Rubbish Bin/ Recycling – many national parks do not have rubbish bins and you often need to take your rubbish with you until the next rubbish bin.
- Playground/ parks – we like to have picnic lunches at parks
- Laundromat – read the comments before you choose one!
- Water – drinking water.
- LPG bottle refill – ’cause not all petrol stations have this capability. Most offer swap and go. There are also people who offer this service right off their driveway.
- Nearby Deals – Some campgrounds or holiday parks will have one-day flash sales. Those are the ones we look out for. But these deals can also be activity or tour discounts. We’ve personally never claimed any deal discounts through CamperMate before and prefer to use bookme.nz for discounts. These are represented by a small yellow box over the icons on the main map.
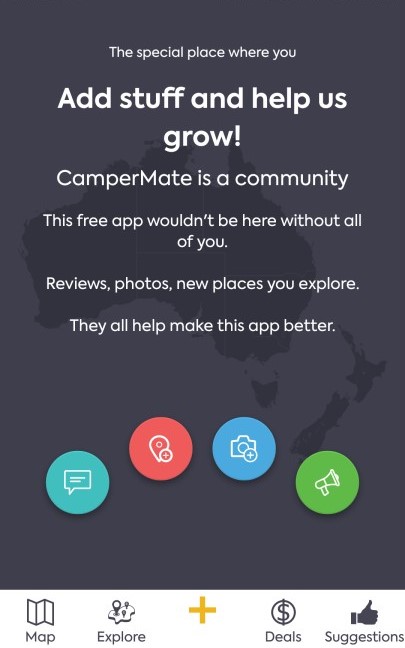
Adding A New Item On CamperMate
CamperMate depends a lot on its users to keep it useful and relevant. If you’ve found something useful (e.g. a new drinking fountain) that doesn’t exist on the map yet, you can add it to the map.
Real easy. Just click on the big plus sign in the center of the bottom toolbar.
You can choose to add a new comment/review, place, photo or just shout out. We’ve personally never used the latter feature (Shout out). CamperMate suggests that it can be used if you need to sell some stuff quick or just to say hello to other campers.
How Useful Are Comments On CamperMate?
I tend to rely on comments more than photos. But you should really use both.
The comments are great because they are more up-to-date:
The community spirit is strong and other lovely campers want you to know whether or not a place is worth visiting or if they had a bad experience camping at a particular campground. The comments may also alert you if a place has been closed unexpectedly.
So don’t skip the comments.
And feel free to contribute (it’s not a must) so that other campers can enjoy the app as you have.
Another App We Find Useful
As we mentioned, to make full use of CamperMate during your road trip, it would be best if you have data on the go.
CamperMate has offline maps for download for both New Zealand and Australia but you might miss out on recent comments.
And we would still highly recommend Maps.Me over CamperMate (or Google Maps) as a GPS navigator. Especially when it comes to mountainous regions where there is hardly any signal.
Maps.Me is our lifesaver in those situations. Download the app for free and save an offline map of New Zealand when you have good Wifi.
Somehow though, Maps.Me is not that great in urban areas.
We try to plan our day in the morning or previous night using CamperMate. Before we go anywhere that probably has no signal.
Then, we key the name of our required destination into Maps.Me. It works a reliable 95% of the time.
Tip: If it’s a lake you’re looking for, you might want to pick out the jetty or starting point of the trail by selecting it on the map. Cause Maps.Me will frequently not be able to find a direct road to the lake.
Conclusion
CamperMate is a fantastic app! Firstly, it is totally free. And secondly, it is very effective and reliable due the strong camping community spirit in New Zealand. Find food, places to stay, attractions and more easily with this handy travel app.
Was this guide useful to you? Did we leave something out? Leave us a comment below =)
Go on and try this app around New Zealand:


Hi,
How do I search for future availability at powered sites? We are in a self-contained camper van. We need power at night for CPAP machines. I can’t figure out how to look for sites on specific dates that have availability.
Hi Cathy, I think for your specific question, you should contact the respective campsite operator. But some of the purple icons (paid campsites) have calendar icons, others don’t. These you can book directly through the app.
Thanks.
Hope that helps.